Baseboards conceal the seams between the floor and the walls. They help give a space a finished look.
Installing baseboard molding may be simple with the assistance of a nail gun. The question is if you don’t have that equipment, can you still complete the task?
So, how to install baseboard molding without a nail gun? There are four main steps.
- Step 1: Remove the old baseboard
- Step 2: Measure and cut the baseboard
- Step 3: Install the baseboard
- Step 4: Finish
This article will discuss each step in detail. Take careful notes, so you don’t miss anything in the process. Let’s start exploring!
What Do You Need To Install Baseboard Molding?
Installing baseboard molding is possible even if you don’t use the nail gun. Otherwise, there are some tools and materials you need to have the job done correctly:
- Compass
- Miter saw
- Tape measure
- 4-foot level
- Hammer
- Nail set
- Adhesive
- Paint (optional)
How To Install Baseboard Molding Without A Nail Gun?
After preparing all the necessary tools and materials, it’s time to carry out your project. Let’s follow these steps:
Step 1: Remove the old baseboard
Begin by cutting through the paint or caulking your trim with a knife.
Try to avoid harming the wall and floor by doing this step lightly.
Then, remove the trim. As a rule, it would appear with the nails still attached to the wall. It would help if you used a scraper and sandpaper to remove any adhesive that may interfere with installing your new baseboard.

Step 2: Measure and cut the baseboard
Measuring and cutting the baseboard is the most complicated step in the process. There are several things you need to do.
Measure the room
Now, you need to measure the room’s perimeter. Round up the measurements of every single wall. Don’t be afraid to give yourself some freedom when cutting, particularly for novices.
Never forget that it’s always acceptable to chop something off. Yet, it’s not always good to change it back on again.
Choose the material
After that, purchase more trim than you may need, just in case you make any measurement error while measuring and trimming.
Some individuals use a 10% surplus estimate, although buying one or two extra stock lengths generally suffices.
It is best to purchase the baseboards in advance and take them inside for one week before installation so that you can adjust.
Establish the floor level
Then, establish the floor level. If your floors aren’t level, they’ll pop out of your baseboard at different spots and will look odd. Using a 4-foot level is advisable to see if the floor’s level is proper.

You can utilize the level to identify the lowest spot in your room if the flooring isn’t level. At the lowest position, attach a spare piece of baseboard towards the wall.
Then, from the top of that baseboard, draw horizontal markings each couple of inches within every direction, making sure to keep level with the line.
After that, draw a chalk line across the horizontal markings. When you’re installing the baseboard, this line will illustrate its top.
Scribe the baseboard
After leveling the baseboard, tack it to an inner corner with two nails. Place the baseboard’s base above the ground.
Then, measure the gap between the top edge of your stapled baseboard and the chalk line with a compass.
Position the point-side of your compass on the flooring and its pencil-tip on the baseboard while keeping it stiff. To draw a line, move the compass across the whole length of the baseboard.
Trim the baseboard following the scribed line using a jigsaw, or a table saw.

Cut the outside corners
Next, measure and cut the outside corners of your project. You may cut the miter joints with a motorized miter saw.
Instead of cutting at 45º angles to make an outside edge, you can cut every piece at a 90º angle. Don’t be afraid to go overboard with your cuts. You can always trim them afterward.
Deal with the miscellaneous pieces
If you encounter an angle that isn’t 90º, utilize a scrap material to fit until you achieve the correct angle.
Cut at 45-degree angles so the wood shrinking would be less apparent with the mid-wall components.
If the baseboard bumps into something and you don’t need to cover any corners, simply trim and scoot it against your object.
At the end of this stage, remember to sand the baseboard before attaching it.
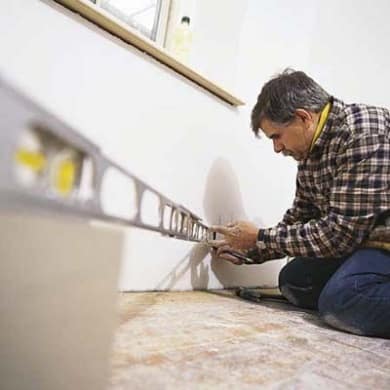
Step 3: Install the baseboard
Here comes the most crucial part! Once you have prepared your baseboard well, you can do the task efficiently.
Nail the baseboard
Start by using the finishing nails to secure the baseboard in place. You can utilize a stud finder to nail. Alternately, bang on the wall to distinguish the hollow sections from the studs.
With a downward angle on your nail set, hammer two nails into each stud underneath the surface. Apply some glue to fill in all of the nail holes. Then, let it dry, and then sand it flat.

For the outer corners, you need to add a small bead of wood adhesive to create a better connection.
On the other hand, you don’t need any adhesive for the inner corners if you have correctly coped with the baseboard.
Install the molding
Use the pin nails to secure the shoe molding to the flooring. You’ll need to clip it into your baseboard if you’re working with concrete floors. Whenever feasible, attach the cap molding onto the studs.
Step 4: Finish
After you’ve finished putting the molding, you’ll need to caulk any damp areas. If you’re working in the bathroom, this step is crucial.
Then, use your finger to apply a little caulk to all the nail holes and any scratches or dents.
Finally, apply the finish coat. This step is optional. You can paint to achieve a more stunning look to your workpiece or to cover the dents.
If you want a visual explanation, you can access this video.
Conclusion
We have shared with you step-by-step instructions on how to install baseboard molding without a nail gun.
Once you don’t have any nail gun, you need to prepare other tools, such as a hammer or a miter saw.
However, you can still complete the task correctly if you follow the steps above.
Hopefully, you will find this article helpful. If you need any further information, please feel free to ask. Thank you for reading!