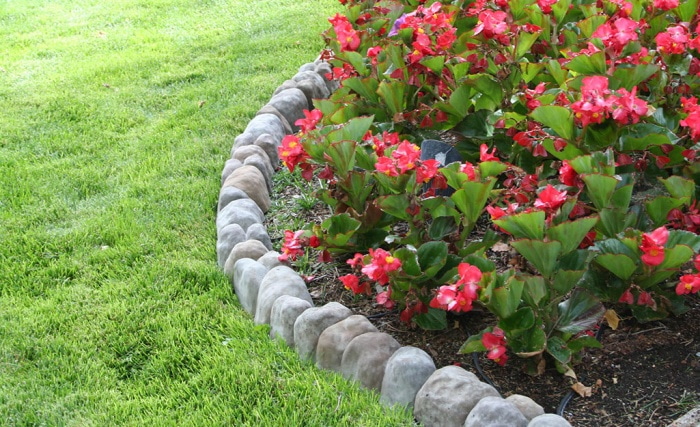
Your lawn’s true charm lies in its flower beds. You must edge them to stay up with and improve their attractiveness. Sharp and sturdy edges can elevate the appearance of the flower beds.
Edging can be done manually or with the help of a power edger. A power edger will save your time and effort. So, how to edge a flower bed with a power edger?
- Step 1: Designing
- Step 2: Marking Out
- Step 3: Acquainted With Tool
- Step 4: Powering Up
- Step 5: Arranging The Blade
- Step 6: Edging
- Step 7: Cleaning Up
Let’s get right into the details!
How To Edge A Flower Bed With A Power Edger?
Although employing a power edger may be a lot of fun and easy, if you do not know what you are doing, you might end up unsatisfied.
For edging tasks, a power edger is significantly more potent than any string trimmer. (read more: How To Trim Bushes With An Electric Trimmer)
To use a power edger for flower beds, you must first understand how the power edge functions.
There are seven steps to edge a flower bed using a power edger, beginning with designing your flower bed and finishing with cleaning up all the trash.
A power edger is a considerably powerful instrument, so if you have never used it before, our step-by-step instructions or this video will walk you through the process.
Step 1: Designing
To begin, create a plan for the flower bed, then choose the line that the edge will follow.
If you incorporate minor curves that match the contour of the flowers growing there, flower beds will appear more intriguing and natural.
If both sides of your garden have flower beds, consider making the flower bed margins parallel or symmetrical to one other.
Also, plan your margins for development if your shrubs and plants aren’t entirely grown yet.
Step 2: Marking Out

After that, you will want to draw a line around the area that you decided to edge. If the region is extensive, you may have to employ a measuring tape and pegs to aid your navigation.
Tie a thread between the anchors for straight lines; put down additional rope or hose for curved lines and tweak until you are satisfied with the shape and size.
After that, use marking or landscape paint to spray on the design. It’s available at most garden centres and hardware stores.
The identifying color may cut off your grass or worn off the ground as time passes, but you may avoid other areas.
Step 3: Becoming Acquainted With The Tool
Before turning on the power edger, notice that you acquire a sense for it. Please find out the main buttons and the trigger’s location and get used to the heaviness of moving it along.
The manufacturer’s instructions will give you a better understanding of the tool and usually feature suggestions for getting the most significant outcomes.
Step 4: Powering Up

Remember to disengage the blade before you power it up. It is safe to start when you’re sure, turn on your power edger, and follow the instructions.
Step 5: Arranging The Blade In A Straight Line And Engage It
Once you turn on the motor, align the blade of the power edger with wherever you decide to create your initial cut. Then, you can securely engage the edge after you are in place.
Step 6: Edging
Now you may gently advance by pushing the power edger ahead while keeping the blade aligned with the path you have drawn.
But, again, make sure you’re moving carefully along it, not causing the edger to travel quicker than it can.
Pull it back if it starts moving slowly or producing a loud noise before you push it forward again. The blade has most likely across a few stubborn roots that will require many rounds to cut through cleanly.
If the power edge hasn’t been formed yet, you might need to brush through numerous times to obtain that professional, crisp appearance.
Move down your specified line at a shallower depth of about three inches for new edging.
Then, for each pass, gradually raise the depth till you reach the required depth. That power edge does need patience in addition to talents.
Also, keep in mind that the blade of your edger may require you to clean it regularly since it collects grass as it rotates.
Step 7: Cleaning Up
After you have finished edging the flower bed, take the sliced dirt and grass and sprinkle it about your flower bed to nourish the soil.
You may also put this garden trash in your recycling bin if you do not want sliced grass apparent in your beautiful flower bed.
After each usage, remember to clean the power edger following the manufacturer’s recommendations.
Pro Tips On Edging A Flower Bed With A Power Edger
Here are our best lawn tips from the pros.
Remove Extra Grass

If you need to remove sections of the lawn to start a new flower bed, mow the grass into strips using a power edger. Cut geometric shapes through it about 12 inches wide, then tie them up.
To cut several of the more complicated roots, dig beneath the grass with a spade in certain spots. You may sell, give, or recycle your grass after it has been wrapped up in pieces.
Upkeep Of The Edger
Like any other tools, power edgers require routine maintenance and inspection to stay in excellent operating order and assure long-term durability.
After each usage, inspect the cutting lines or blades to see whether they need to be sharpened or replaced.

If you have got a fuel edger, check the fuel before each usage and change it according to the manufacturer’s recommendations.
It is necessary to regularly maintain your edger at an approved vendor, which depends on its brand and type.
If your product came with a guarantee, the legality of your warranty might be contingent on this being fulfilled, so double-check!
Edging Depth
Most people edge their flower beds to a seven-inch depth. However, if you hesitate how deep to go while edging your flower bed, the shallowest depth must be five inches.
A five-inch depth is standard because you will need to cut the outer five inches of soil to eliminate grassroots.
Eventually, grass will regrow over your newly planted flower beds. Remember to choke off your flowers and plants.
You will save a great deal of effort on future garden care if you leave the lawn’s grass out of the flower beds.
Apply Mulch
It’s best to apply mulch after you’ve completed edging the flower bed and inserted all your plants.
This way would keep weeds at bay and give the bed a deep, black hue that contrasts beautifully with your grass lawn.
Mulch helps to retain water and regulate soil temperature. It implies that your flowers will use less water, making them healthier.
When you apply organic mulch, this sort of mulch will break down over time and contribute valuable nitrogen to the plants.
Frequently Asked Questions
Here are some frequently asked questions we have collected while researching this field. You need to take note of some of the questions about this topic.
Is There Any Caution On Edging Flower Beds?
Before you begin edging, double-check the following:
- Protect your eyes and ears against rocks and splinters by wearing ear and eye protection. Ear protection will prevent irreparable hearing loss.
- To safeguard your body, put on a long-sleeved shirt and pants.
- Wear boots to protect your feet.
- Examine the serviceability of the power edger.
- Keep an eye on the extension cable if you’re using an electrical power edger. Remember to utilize a safe power supply. A poor connection to the electric power socket poses a severe safety risk.

Do Grass Clippings Contribute To The Growth Of Weeds In Flower Beds?
Grass clippings are not the cause of weeds, although they can exacerbate the problem. When you cut a weed-infested lawn, the weed seeds may spread.
As a result, even if you have mulched your flower bed, you may notice more weeds sprouting after cutting.
Which Is The Best Time To Mow?
The optimum time for mowing your lawn is in the middle of the morning, between 8 AM and 10 AM. The sun has risen higher, and the grassland has already dried out a little after any watering.
However, cutting your grass in the early evening also helps to prevent fungal diseases from wreaking havoc on your lawn.
Conclusion
Edging is to keep your flower garden nice and tidy. The superpower of the power edger is that it can edge a flower bed more intelligently and rapidly.
All you need is a basic understanding of how to use and handle a power edger.
Hopefully, this article appears to provide you with a detailed guide on how to edge a flower bed with a power edger.
Thank you for reading!