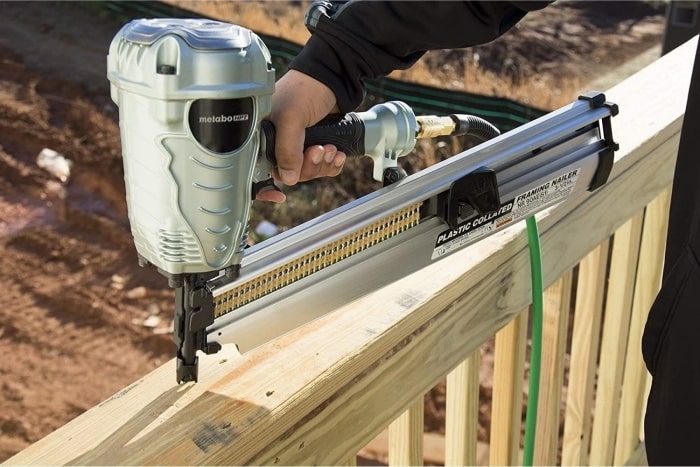
A framing nailer, often known as a framing gun or nail gun, is a piece of popular equipment used in construction. This woodworking tool is highly productive yet can be hazardous and cause you injury.
But don’t worry, if you can use it properly, even when you’re an amateur, it will help you with your work much faster than a qualified carpenter using a hammer.
Then, how to use a framing nailer? This article will give you a guideline in detail. Continue reading to get what you need.
Things You Need Before Using A Framing Nailer
With a framing nail gun, you can swiftly construct the framework of a house or other construction.
However, to ensure that you are using a framing nail gun appropriately, you need to equip yourself with sufficient knowledge as this can pose a significant risk of injury.
Some carpenters had to be admitted to the hospital in the worst-case scenarios. There’s no way to take the situation lightly. First things first, you’ll need this list of items to operate a framing nail gun safely:
- Glasses
- A helmet
- Hand gloves
- Earbuds or Earmuffs (to protect your ears from hearing loud noises from the nailer)
- Safety clothing
How To Use A Framing Nailer
Step 1: Wear the proper safety gear and check the condition of the framing nailer
As mentioned above, too many accidents have occurred; you have to make sure that you and/or your co-workers wear protective clothing and turn off the power source whenever you don’t use your nail gun.
In addition, there shouldn’t be any children or pets around your working area.
Before starting, make sure the nail gun is in good working order, and there are no nails lodged in the driveway.
If everything seems okay, put some oil in the air hose connector and prepare it to load the nail strips.
Step 2: Load The Nail Gun
If you don’t load your frame nailer with nails, it won’t be able to fire any nails. First, make sure the nail gun is loaded with nails that are the right length and size.
Read more: Nail Gun Not Shooting Nails: How To Fix?
Then, place the nail strip in the magazine according to the specified style and angle.
Combining nails of various sizes and lengths is not a good idea since this might produce nail jams.
Instead, make sure you buy a framing nailer that can be readily modified to accept different nail sizes for versatility.
Step 3: Choose your trigger mode

Most framing nailers now have a smart button that allows you to choose between sequential and bump triggers.
However, you should select the sequential triggers as you can only shoot the nails one at a time, which is genuinely safer and allows you to have more control and precision while nailing.
Meanwhile, the bump mode is more likely to do a better job for quicker, continuous nailing. But don’t use the latter mode unless you’re highly familiar with the tool, as it’s hazardous.
Step 4: Test The Framing Nail On Scrap Wood
If you’re a beginner, don’t hesitate to try the framing nailer on wood scraps to get used to it.
You must apply a specific amount of pressure to the nailer’s nozzle before firing a nail.
You’ll need to practice and refine your technique until you can shoot through thick and thin wood scraps without splitting them.
Step 5: Place The Framing Nailer Against The Material You’ll Be Nailing
This is when you put your framing nailer on the place you want to attach or secure, then position your hand so that the trigger is easy to reach.
Make sure you’re holding it firmly and steadily. Also, be aware that there will be a kickback, so be prepared and keep an eye on your other hand, too.

Step 6: Press The Contact Tips Against The Chosen Surface
A framing nailer’s contact tip is spring-loaded primarily, so it doesn’t require much force to drive it.
So keep this in mind when using your nail gun; press the tips gently on the surface and balance your body not to get startled from the kickback.
Release the trigger as soon as you’ve blasted your first nail, as holding the trigger down causes a lot of pins to be fired at once and leads to jamming.
Step 7: Use Fastening Nails Methods
Face nailing and toenailing are two procedures that may be used with a framing nailer. The first one is more practical since you need to align the rifle with the target item perpendicularly.
Toenailing, on the other hand, is a technique for driving nails at an angle. Unfortunately, this is more difficult to do.
Step 8: Examine The Flush Condition Of The Nails
Check if the nail gun flushes correctly or stops midway when you take it out after driving the nails.
If the nail doesn’t fully penetrate the surface, it’s possible that you’re not using the correct air pressure, not applying enough weight, or moving away from the surface too soon during nailing.
Avoiding any of the scenarios mentioned above will ensure a good countersink and adequate holding strength.
Step 9: Disconnect And Reload The Framing Nailer
When you’ve finished driving the nail, unplug the framing nailer. Again, it is safer to perform this before starting the following cycle rather than afterward reloading it.
To avoid dry-fire, keep an eye on the nail strip in the magazine and attempt to stop shooting when it approaches the end (leave 3 to 5 nails in it).
You may also choose a framing nailer with a dry-fire lockout system.
Conclusion
Woodworking is a gratifying activity, and it is not difficult to get started. Nailers for framing come with many benefits.
All of your tasks will go smoothly from start to finish, and your job will be more effective, efficient, and less time-consuming.
Hopefully, you found this post useful as you learn how to use a framing nailer for the first time.
However, if you are not confident enough to use it and are afraid of hurting yourself, get someone to help you. Good luck and stay safe!