
Having problems cutting that crown molding with a miter saw?No need to worry.Cutting a crown molding with a miter saw is not only possible, but it can be done in record time.The task at hand is tricky since you would need to pay attention to minute details like those compound angle cuts, but you would be fine.I have been in a similar situation in the past.I was making a lot of horrendous mistakes initially, especially when positioning the crown molding on the base of the miter saw, but I got better with practice.And that is what you need; a mix of practice and patience.This piece was created to ensure that cutting the crown molding using the miter saw becomes something you enjoy doing.
Let’s get started!
What You Need For This Task
- Miter saw
- Crown molding
- Pencil
- Tape
- Safety goggles
- T-square
- Crown stop
There are two methods.
One method has the crown resting at an angle against the fence of the saw.
Another method involves letting it lie flat on the table of the saw and adjusting the blade to cut through it.
If you are still new to crown molding cutting, the 1st method is less technical with much less possibility of errors compared to the 2nd.
How To Cut a Crown Molding? – Step by Step Instructions
To guarantee your crown molding fits the space between the ceiling and wall precisely, we created these step-by-step instructions.
Adhere to these instructions, and you should have properly cut crown molding in no time.
Method 1
- Step 1: Support the Saw on a stand of reasonable height
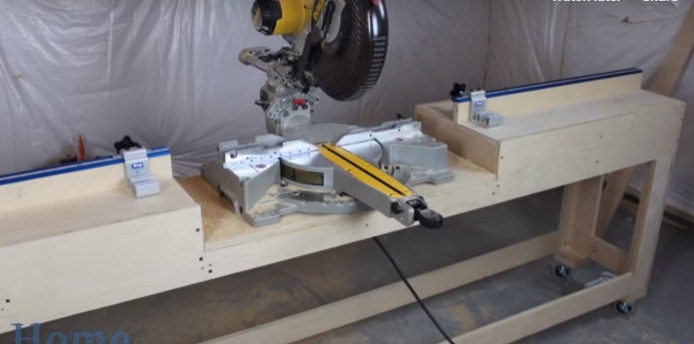
To ensure the saw performs at an optimal level, it needs to be supported on a stand of adequate height.
If you don’t have a support stand, you might have to build one.
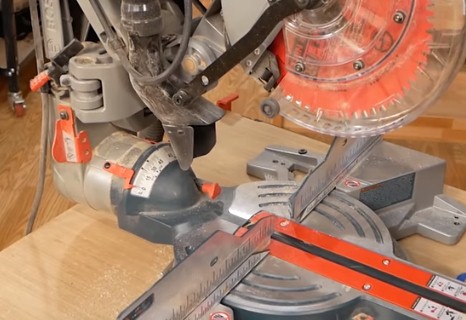
- Step 2: Position the crown molding on the saw
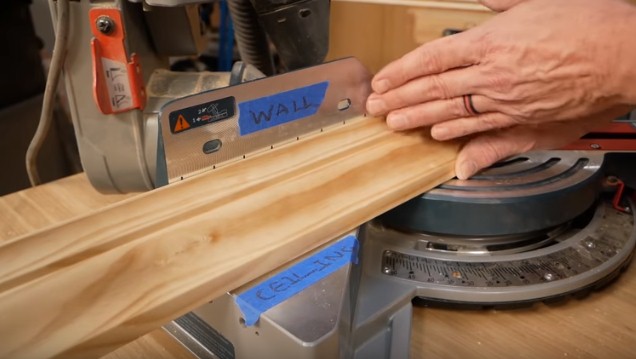
Once your saw is set, place it on the table of the saw.
The ideal setup should have the lower part of the crown molding touching the fence of the saw.
To ensure you don’t forget the positioning of the crown, you should place a piece of tape on the fence of the saw and write ‘bottom’ on the tape.
It is important the exterior edge of the lower part of the crown lies flat against the fence.
Then you lock this position of it using a crown stop.
Anything contrary to that would earn you a bad cut.
In the absence of the crown stop, you can ensure the right position of it is set by placing a piece of tape on the base of the miter saw and marking the line on which the edge of the crown’s lower part lies flat on the fence, but this is usually liable to errors.
- Step 3: Calibrate the saw
Before you make that cut, you have to calibrate the saw accordingly.
To do this, you have to raise the angle adjustment lever since this part of the miter saw allows you to alter the angle the saw cuts at.
Firstly, with the lever raised, adjust the table of the saw to the 90° mark.
Use the square to ensure the cutting angle is set at 90°.
This guarantees a perfect cut every time.
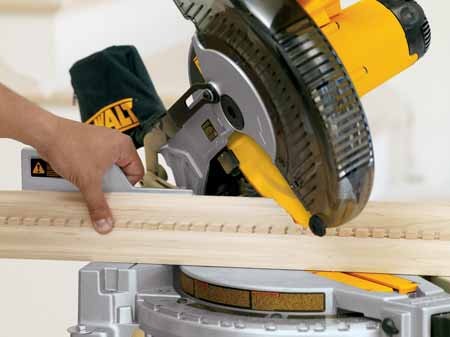
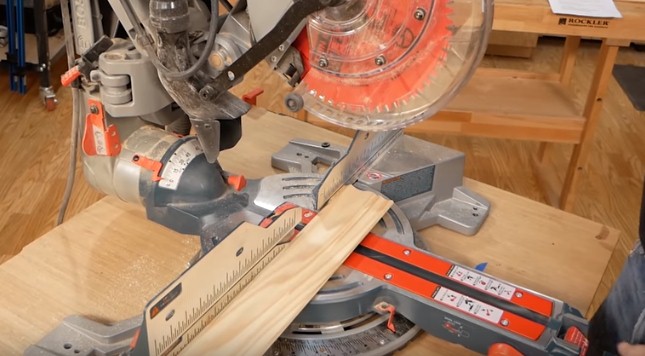
- Step 4: Cutting
For it to fit between the ceiling and the walls of your home, you will need to make two sets of cuts – outside and inside cuts.
To make these cuts, the cutting angle has to be adjusted to 45° using the miter scale.
With the crown molding appropriately poised (i.e the ends of the crown in the line of action of the saw blade), turn on the power switch, and bring the blade down on the wood.
To make an inside cut on the crown, the cutting action of the blade is carried out along the length inwardly.
While for the outside cut on the crown, it is the reverse.
While cutting, avoid applying too much pressure on the blade.
If you do so, the cut obtained wouldn’t be a clean one as the edge of the crown would come out jagged.
Method 2
In case you don’t have a crown stop to keep the crown molding in position or have a crown molding that is rather wide to fit within any conventional crown stop, method 2 exploits the functionality of the miter saw to your advantage.
- Step 1: Setup the saw
Place the saw on a stand that allows you to maneuver the saw controls without straining yourself.
- Step 2: Place it on the Saw
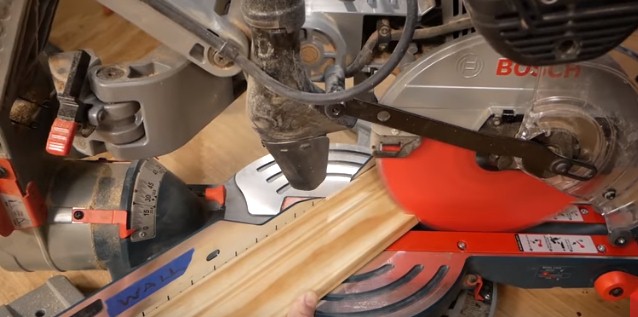
Unlike in the previous method, you don’t have to set the crown molding to a particular orientation, but the bottom side of the molding must be against the fence.
Just let the crown holding lie flat on the table of the saw against the fence.
- Step 3: Adjust the cutting angle of the saw

This will depend on the side of the corner you intend to create on the crown molding.
For the left side of an outside corner, you would have to adjust the blade to the left.
The miter lock handle and the handle should help you in this regard.
The cutting angle of the miter saw should be adjusted to 33.9°.
- Step 4: Adjust the miter tableSwing the miter saw table to the left with the miter scale reading 31.6°.Usually, you should see a mark on the angle.
- Step 5: Make the cut
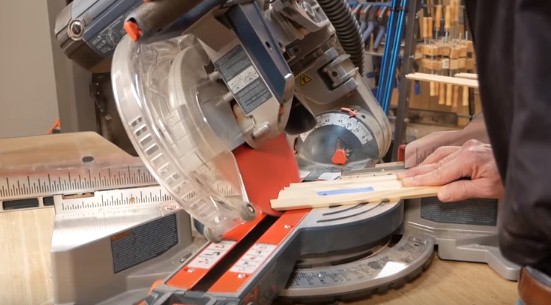
With everything ready, turn on the power switch.
Gently, notch the cutting blade in the direction of the crown molding.
For the right side of an outside corner, the top part of it has to be up against the fence.
Also, the miter saw table and blade position is adjusted to the right but the angles remain the same.
Conclusion
We hope you enjoyed this tutorial.
The miter saw is a powerful tool and would help you in cutting the crown molding accurately.
It is important you don’t forget to don your protective goggles to avoid visibility problems.
If you have any questions or suggestions that could prove helpful in this topic, do let us know as soon as possible, and we will drop you a line.
And if you enjoyed this tutorial, please share.
Read more: Can a 10 Inch Miter Saw Cut a 4×4 Stock?