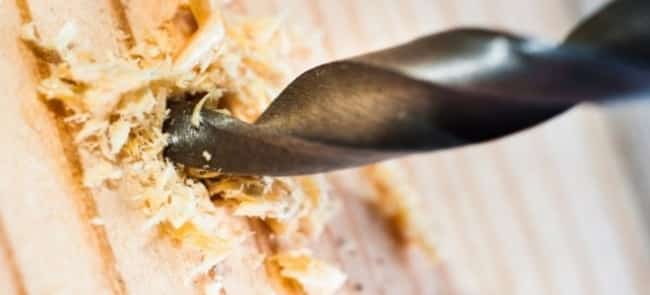
You will occasionally encounter your drill bit that becomes stuck while operating on your woodwork.
We used to have the same problem, so we researched and discovered a few different methods for removing a stuck drill bit.
There are numerous methods to do it, and we will show you the easiest and most time-saving ones. So, how to remove a stuck drill bit from wood?
If the drill bit shank protrudes out of the wood, simple hand tools like pliers may readily remove it. You’ll need a screw remover kit if its head is broken within and can’t be accessible.
If you choose to drill from the opposite side, you can use a screwdriver to pry the jammed drill bit out after creating a thin hole.
Let’s get right into the details!
Why Do Drill Bits Get Stuck?
You should remove a jammed drill bit. But how did it become trapped? There are some possibilities for why it’s happening.
First, you may not lubricate the chuck correctly. Drill lubricating is an essential element of routine drill maintenance.
This step will make inserting and removing the drill bit much easier. You may need to over-tighten the chuck in certain situations.
The vibrations from using the drill may have tightened the chuck on the power drill even further. It’s possible that by the time you’re ready to ditch the bit, it’ll be extremely tight.
Make sure that you’re using the appropriate drill bit for the task. Some drill bits, for instance, appear for drilling metal, while others are better suited to drilling wood.
You can decrease the possibilities of the bit shearing off or becoming stuck when drilling into the object by doing so.
3 Ways To Remove A Stuck Drill Bit From Wood?
We have compiled three different methods for particular specific cases.
#1. Use Pliers

You’re fortunate if the drill bit is a broken one, and you can get to it. To remove it, all you’ll need is a plier and the following procedure.
Step 1
To extract the jammed drill bit out of the wood, spread the pliers wide and grip the spindle tip.
Any plier with toothed jaws or a locking feature will suffice. Be especially cautious since the fractured bit’s edges may be razor-sharp. Notice not to injure yourself by mistake.
Step 2
Swivel your bit in a counterclockwise manner by pressing the plier handles.
If the bit doesn’t move, pour some lubricating oil into the hole for instruments to seep into, making it easier to remove the stuck drill bit.
Most of the drills appear to rotate clockwise inward and counterclockwise outward.
Step 3
Take the drill bit out when it is free and loose. Jerking your pliers might shatter the drill bit, making the extraction much more difficult.
#2. Use Screw Extractor

So, before explaining this method that using a screw extractor kit, let us first describe the equipment.
After drilling the head of a headless or corroded screw to be pushed out, a screw remover kit is responsible for removing it.
You can rely on the instructions in this video to better understand how it works. View it now, so the remainder of the post makes sense.
When dealing with damaged drill bits, utilizing the screw remover method may be difficult. Drilling a hole in the snapped drill bit’s breaking point will be the most difficult challenge.
That the breaking point is not flat, making it difficult to start a hole. Another issue is the drill bit material’s toughness.
Because the manufacturer usually constructs the drills of a more complex substance than screws, making the hole for the remover to function.
Let’s pretend the piece was neatly snapped off, and the bit is a medium-hard substance. To operate the screw extractor tool, follow these simple instructions.
Step 1
Choose the correct extractor tool size for the broken bit. You cannot utilize this approach if it’s a thin broken drill bit.
Step 2
Insert your extractor equipment into a drill so that the drilling head protrudes because a screw extractor kit operates in the other way, reverse your drill.
Because wood is relatively soft, you can pull the bit out while drilling. Make sure you’re using a high-quality drill for this.
Step 3
Apply a small amount of oil on the breaking point to aid in cooling. With the drilling end, bore a hole for the extractor tool. Drill a hole about a quarter-inch deep.
Step 4
Disconnect the extractor from the drill and replace it inside the drill with the end. Maintain the drill’s rotation in the opposite direction.
Step 5
Continue pressing inwards while starting the drill slowly. You will rotate out the broken bit. It’s that simple.
#3. Drill From The Opposite Side

So, another great way to get rid of a stuck drill that isn’t the wood one is to drill from the other direction.
If another end of the wood is reachable and you want to drill through it, you may use a drill that’s comparable in size to the one you’re using to drill from another side.
Make careful you don’t repeat the same error that caused the last exercise to break. Also, be cautious since touching the jammed drill’s tip may cause the new one to shatter.
So, let’s dive into the specifics and actions you’ll need to take.
Step 1
The first stage is to pinpoint the exact location where you locate the jammed drill bit. You can do it in a variety of ways, depending on the circumstances.
Assume you’re drilling perpendicularly to the wood’s surface; in this case, you may use graph paper to line one end with the product as a reference point.
Next, on the graph paper, make a note where you lodge the drill. Place the graph paper on the opposite side, using the same reference points, and note the drilling location on the opposite side.
Step 2
Insert a bit with a smaller diameter than the shattered bit in a drill and begin drilling slowly from the other side. Stop until you reach the other jammed drill. Make sure you’re drilling in the direction of the damaged drill.
Step 3
Pound it out with a metallic rod or a screwdriver once you’ve located the trapped drill from the opposite side. Take extreme caution to avoid damaging the workpiece.
Bonus Tip: Remove A Broken Drill Bit From Wood

The drill bit may have sheared off within the drill in several situations. If this is the case, using one of the procedures listed above may be more difficult.
To obtain a hold on the damaged bit in this situation, you’ll need pliers. Then begin slowly turning the chuck clockwise or counterclockwise.
This way relieves the bit’s pressure and enables you to detach it from the drill securely.
Bear in mind that the drill bits have sharp edges, especially if they break off, as a quick safety tip. As a result, you should exercise caution when dealing with the drill bit to avoid injuring yourself.
How To Prevent Getting Drill Bits Stuck?

If you have the drill bit caught in wood, we have shown you how to pull it out. You can avoid these circumstances in the future. You’ll be OK if you take these measures.
For Wood Surface
- Always utilize drill bits that are well-maintained and sharp.
- Different types of wood need other pieces. Make sure you’re using the right drill bit each time.
- To prevent hole splintering or blowouts, drill quickly.
- Allow time for the drill bit to cool down after drilling several holes in hardwood.
- When drilling into objects like hardwoods, use an expert drill.
For Hard Surface
- To avoid bit staining, notice that your drill bit will be seated and snugged correctly in your drill. Drilling at modest speeds on steel and hard surfaces like cement is always suggested to prevent overheating and damaging your drill bit.
- Select the appropriate drill bit for every surface, such as a brickwork drill bit for concrete.
- Depending on the kind of surface and your drilling method, use coolant. When drilling through metal, use some drops of oil. When you drill into concrete, consider adding water to make the work easier and dust-free.
Read more: How To Screw Into Concrete Without A Hammer Drill?
What Caused My Drill Bit To Snap?
Drill bits can shatter for a variety of causes. The most prevalent is exceeding the capacity of the bits by twisting them.
When the bit isn’t sharp enough and isn’t drilling properly, the twisting forces rise. One reason that causes broken drill bits is bending them owing to poor drilling techniques.
Conclusion
There are many alternative options on how to remove a stuck drill bit from wood. You already know three methods for removing damaged drill bits after reading this article.
Therefore, you can take care of these issues on your own!
Thank you for reading!